While on vacation the other week, the only laptop I brought along was my macbook pro. That being said, I still wanted the ability to jump into Linux while I was away. I needed to virtualize. I’ve used VirtualBox in the past, and while it’s fine for running headless installs, I find that it is not a great experience on macOS when trying to run a full desktop environment. So I downloaded the free trial of parallels desktop 15, and honestly… it was great. Afterwards, I was motivated to improve the experience of VMs running on my (Linux) desktop.
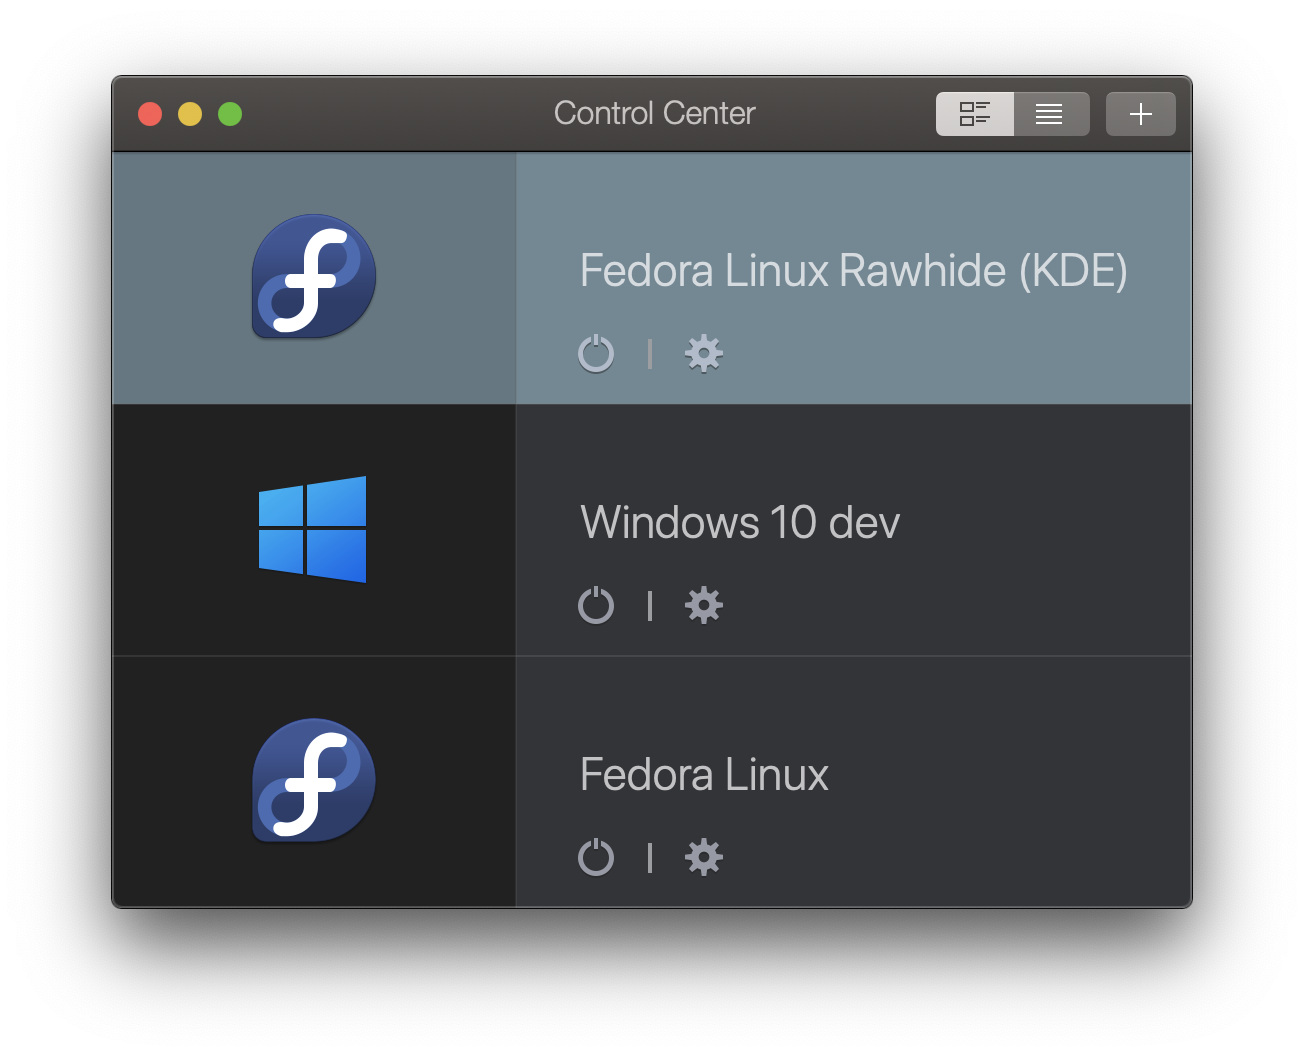
Parallels handled graphics on both my Windows and Linux guests wonderfully. I would full-screen the VM and it felt like I was running that OS directly on my macbook (for the most part). I was sad when the trial was over, but decided not to buy the subscription. My main reason being… my VM computer is not my macbook, it’s my Linux desktop.
I love libvirt and virt-manager, but using parallels showed me that I really needed to figure out how to improve the graphics situation of my VMs to catch up. I wanted to be able to work in guest VMs, without a lagging UI or feeling like I was in a VM.
VFIO - GPU Passthrough
Prior to my trip, I had been experimenting once again with VFIO… and actually got it working* for the first time. If you don’t know what this means, basically in Linux it is possible to pass a full device, like a GPU, through to a VM to be used directly. The technology was made more widely known a few years ago from the “X Gamers, 1 CPU” serries of videos Linux Tech Tips made.
I was able to temporarily run both Proxmox and Unraid on my desktop, and pass my gpu directly to Fedora VMs. While it was a neat experiment, I realized it can also be quite a pain.
I currently only have one GPU in my desktop, so to pass it to the VM I had to disable it on the host. Not having a GPU for the host system meant that I had to start the VMs from another device, which honestly isn’t that bad. The much worse issue however, was that the gpu would often get stuck while being passed around, so I had to reboot my host whenever the VM restarted… which defeated the point of using a VM instead of multi-booting.
So to properly utilize VFIO and have a more stable setup, I would want a second GPU. In truth though, I realized this setup wasn’t what I was looking for. KVM gpu passthrough is a great option if you run Linux as your main computer, but want to be able to boot into a Windows VM to play games. But GPU passthrough is slowly becoming overkill even for that, as gaming support on Linux keeps getting better.
Aside from having an occasional Windows VM to play around with, I mostly want to run Linux VMs on a Linux host. I needed to figure out how to let my VMs utilize the power of my GPU, without the complications of GPU passthrough…
Virgil
Introducing, virgil. According to the project’s website:
Virgil is a research project to investigate the possibility of creating a virtual 3D GPU for use inside qemu virtual machines, that allows the guest operating system to use the capabilities of the host GPU to accelerate 3D rendering. The plan is to have a guest GPU that is fully independent of the host GPU.
So, Virgil essentially allows libvirt to create virtual 3D GPUs, that work with the host GPU for 3D acceleratuon. This means, that I should be able to get high performing VMs, including the graphics, on my Linux desktop.
Setup
Enabling virgil for a VM using virt-manager actually ended up be much easier that I had anticipated. Here is how to do it:
Create a VM
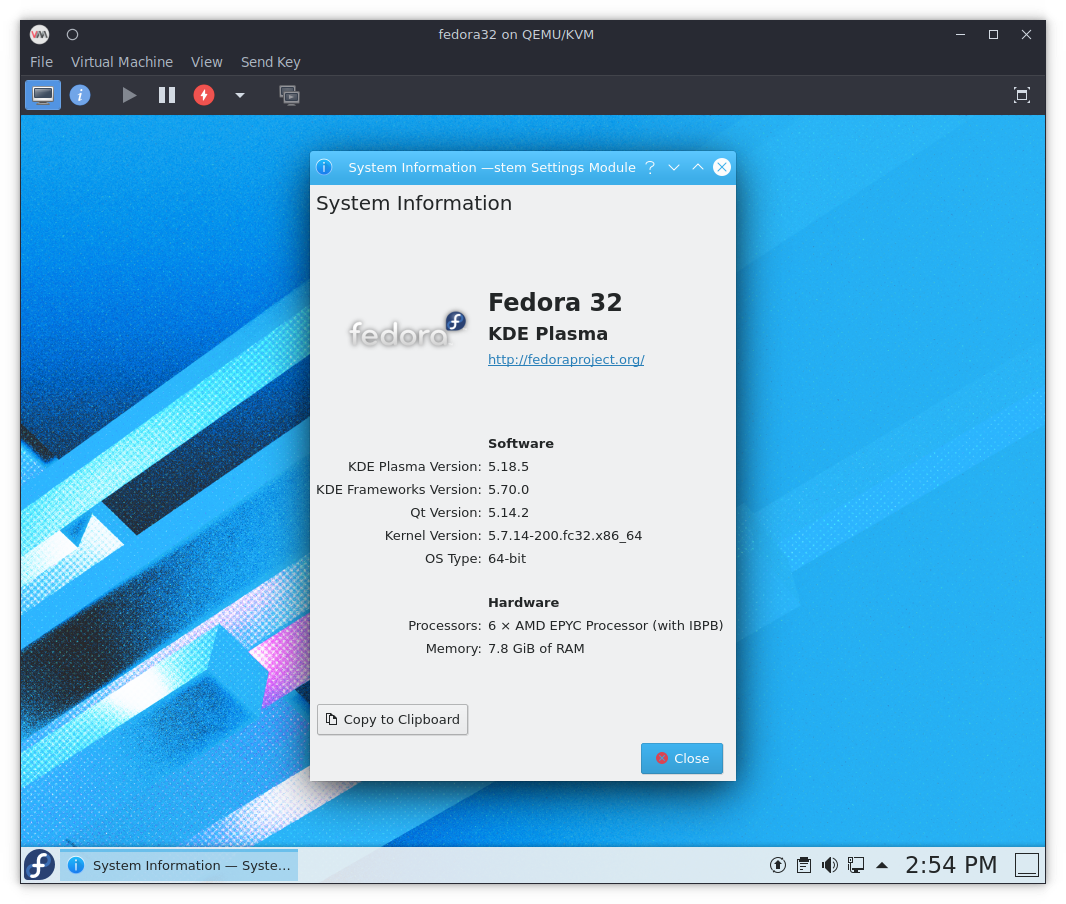
First, create and install a new virtual machine using virt-manager. I
recommend going through your normal install process and then boot into the
installed system once, just to ensure that everything works as expected. If
things look good, shutdown the VM and open up the settings window.
Enable VirtIO and 3D Acceleration
Spice Settings
In the settings menu, open up the Display Spice section.
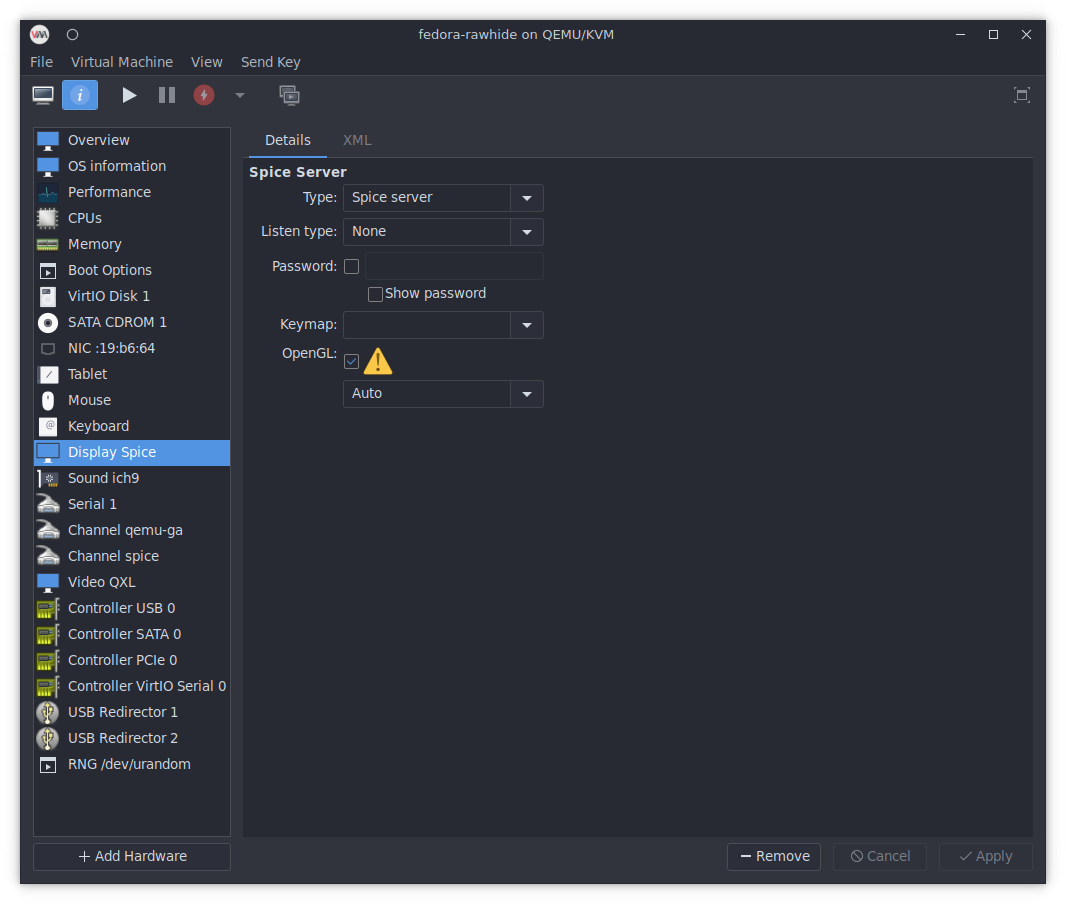
Select Spice server for Type:, and None for Listen type: (virgil only
works on local VMs right now). Lastly, make sure that the OpenGL checkbox
is checked. Hit Apply.
Virtio Settings
Next, select the Video Virtio section.
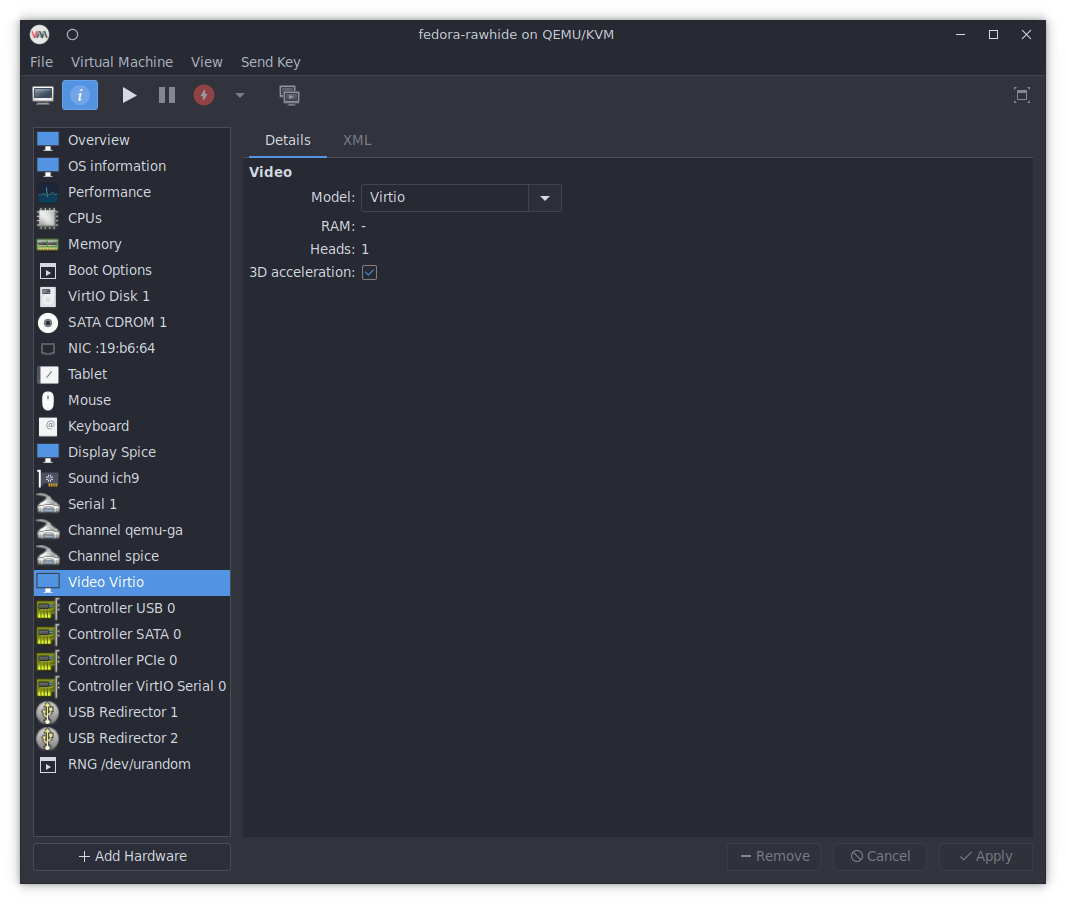
Switch to Virtio for Model:, and make sure to check the 3D acceleration
checkbox. That’s it! Hit apply, start up the VM, and verify that it is working.
Testing and Comparisons
Youtube Video Playback
While configuring this for the first time, there were a few benchmarks I used to tell if and how well it was working. The first one, was simply opening up Firefox and trying to play a fullscreen Youtube Video (at 1440p).
Now to be fair, the video playback was still okay before I made this change. This wasn’t a good measure, but rather an initial test.
Unigine Heaven Benchmark
My next step was to give the VM a real GPU test, so I downloaded the Unigine Heaven Benchmark. First I got my baseline by running the benchmark directly on my host system. It should be noted that I did have other applications running during all of these benchmarks.
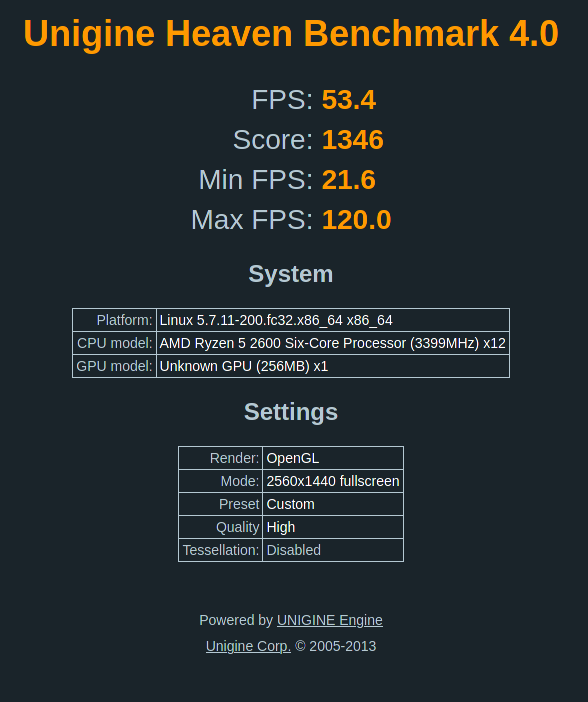
So not bad, and roughly what I expected. Next, I tried running it in the VM…
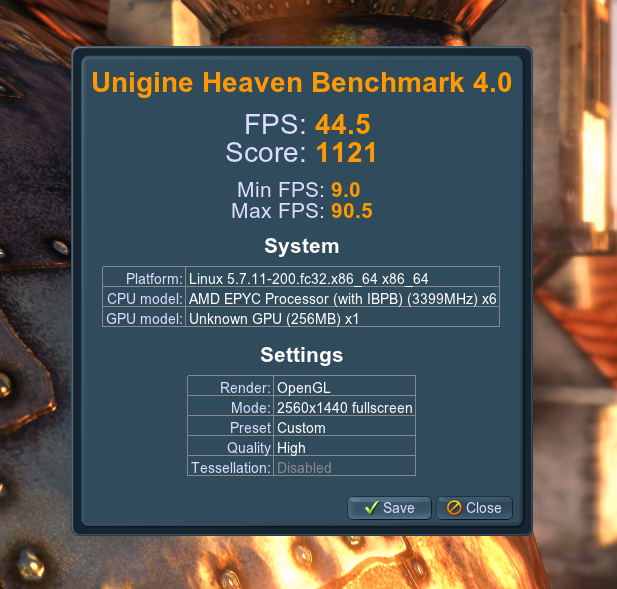
While not as good as on the host, it is a very respectable result. Especially after remembering that the VM had less cores and RAM assigned to it compared to the host.
Additionally, my default VM wouldn’t even run the benchmark. I was able to open it, but the load screen ran frame-by-frame. Turning on the 3D acceleration settings definitely made a difference.
Portal 2
With the Unigine Heaven benchmark working in my VM, I decided to attempt the next test… playing a video game. Now, I have zero intentions of running games in my VMs, but this is the most common use case for having a GPU-passthrough setup, so I wanted to see how this system compared.
I decided to try running a classic game: Portal 2. It’s not a very resource intensive game, but one that certainly does not normally run well in my VMs. I installed the game, started a level… and was immediately forced to stare at the ground.
Staring at my character’s feet, I was reminded that I was playing in a VM, and that the game didn’t actually have my proper mouse capture. It only had the input clicks from my host to the VM spice window, which wasn’t enough to actually play the game.
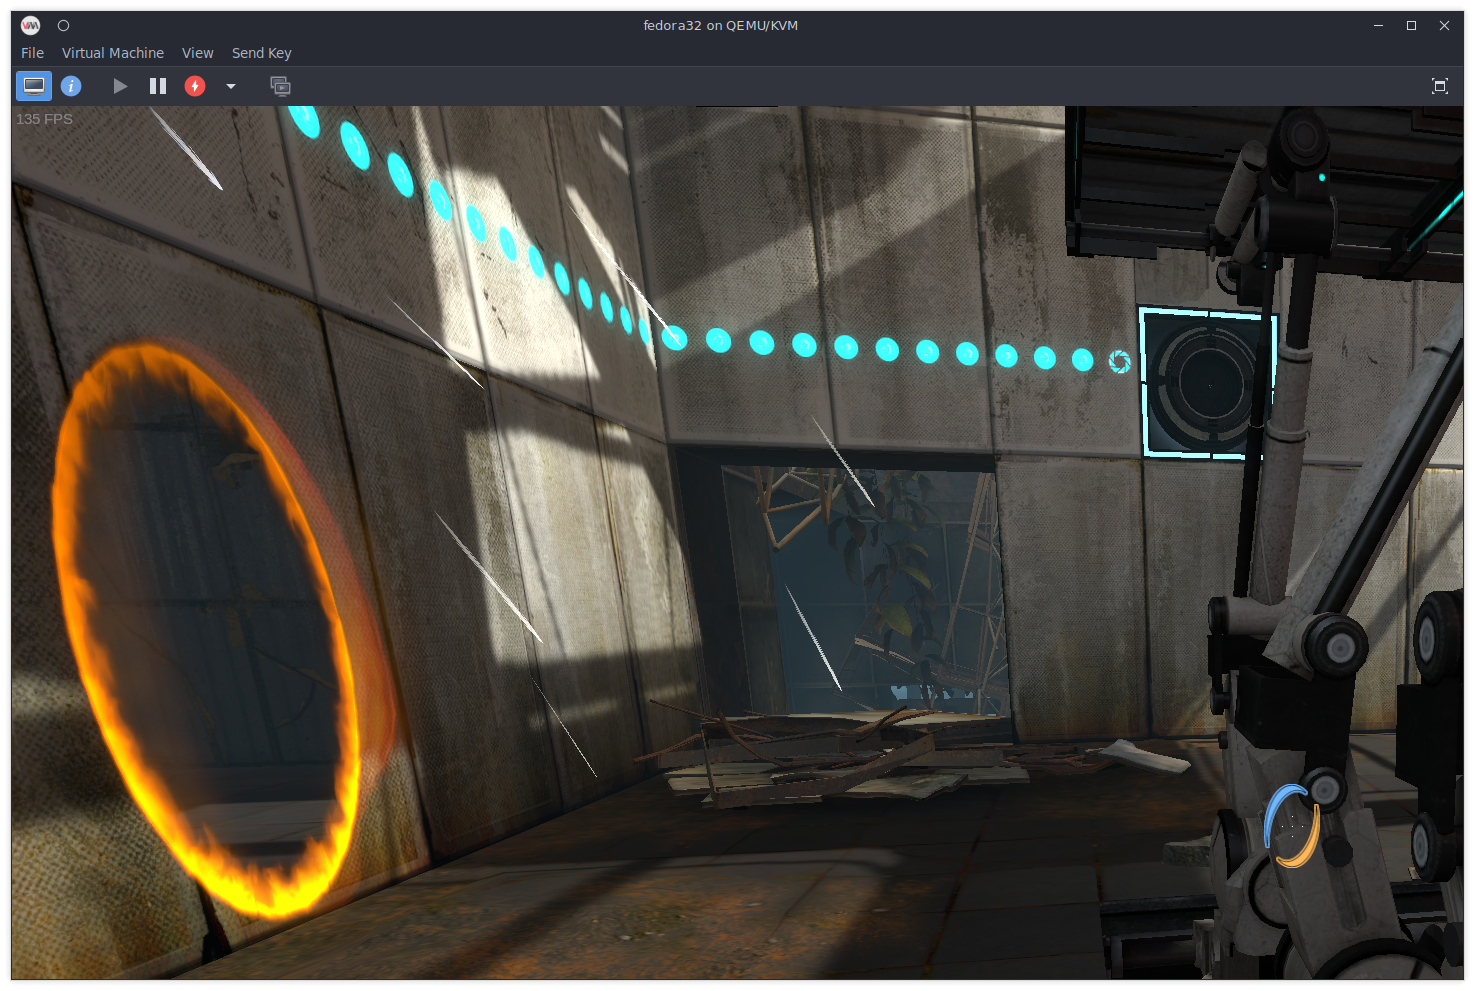
Anyway, after one VM shutdown and usb mouse pasthrough later… I was playing Portal 2! It was a little glitchy for the first few seconds, but afterwards ran well. I think the initial lag was likely due to the system heavily hitting the virtualized disk while loading the level. Regardless, I was thrilled.
Drawbacks/Limitations
While I’m very happy with the performance of my virtio VM, there are a few drawbacks or limitations to keep in mind:
Need to pass through hardware devices: … like a mouse when gaming XD. This could also be a webcam, microphone, flash drive, or even a full ssd if you need better IO in the VM.
Linux Guests Only: While researching, I saw conference talks about getting virgl working on Windows , but I think it currently only works with Linux guests.
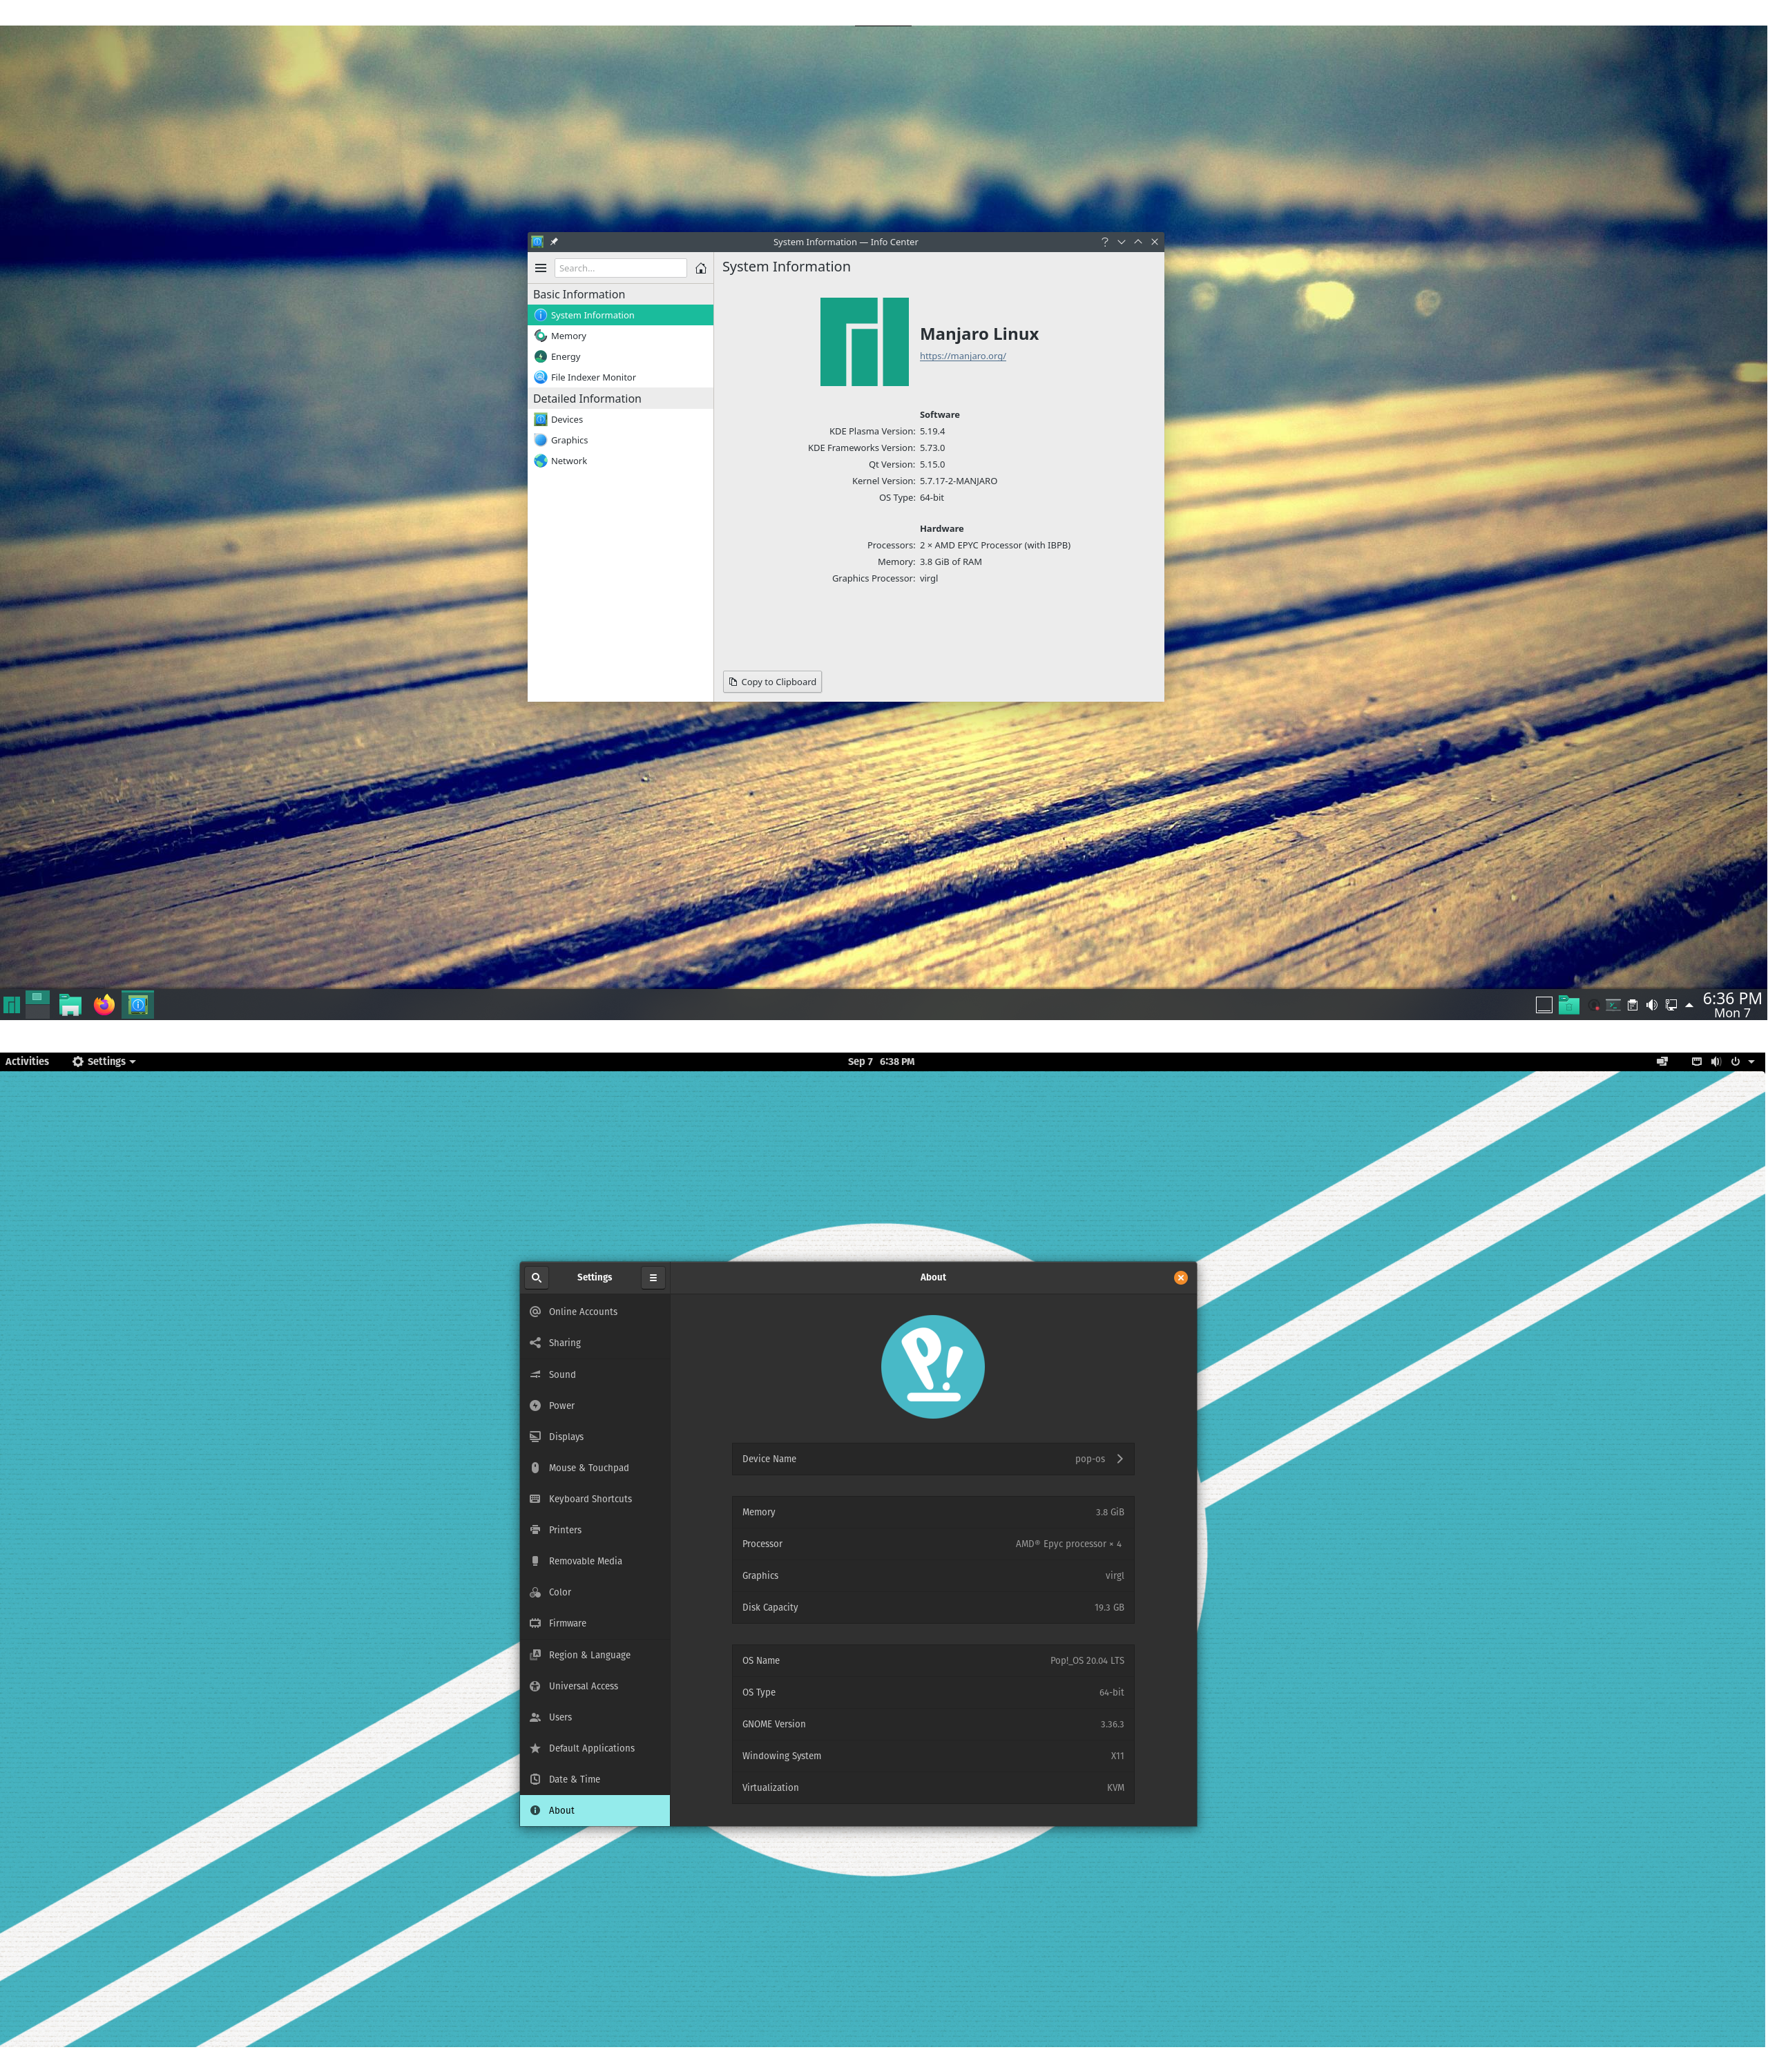
Even on Linux, some Distros might freak out a bit: I had weird issues when trying it on some of my RHEL 8 VMs. The mouse pointer wouldn’t show and the screen would glitch and flicker when running high graphics tasks. I’m Not sure why it’s happening, but I’m guessing it might be related to older software packages/kernel. I have tried it with Pop_OS! and Manjaro VMs and they seem to work just fine.
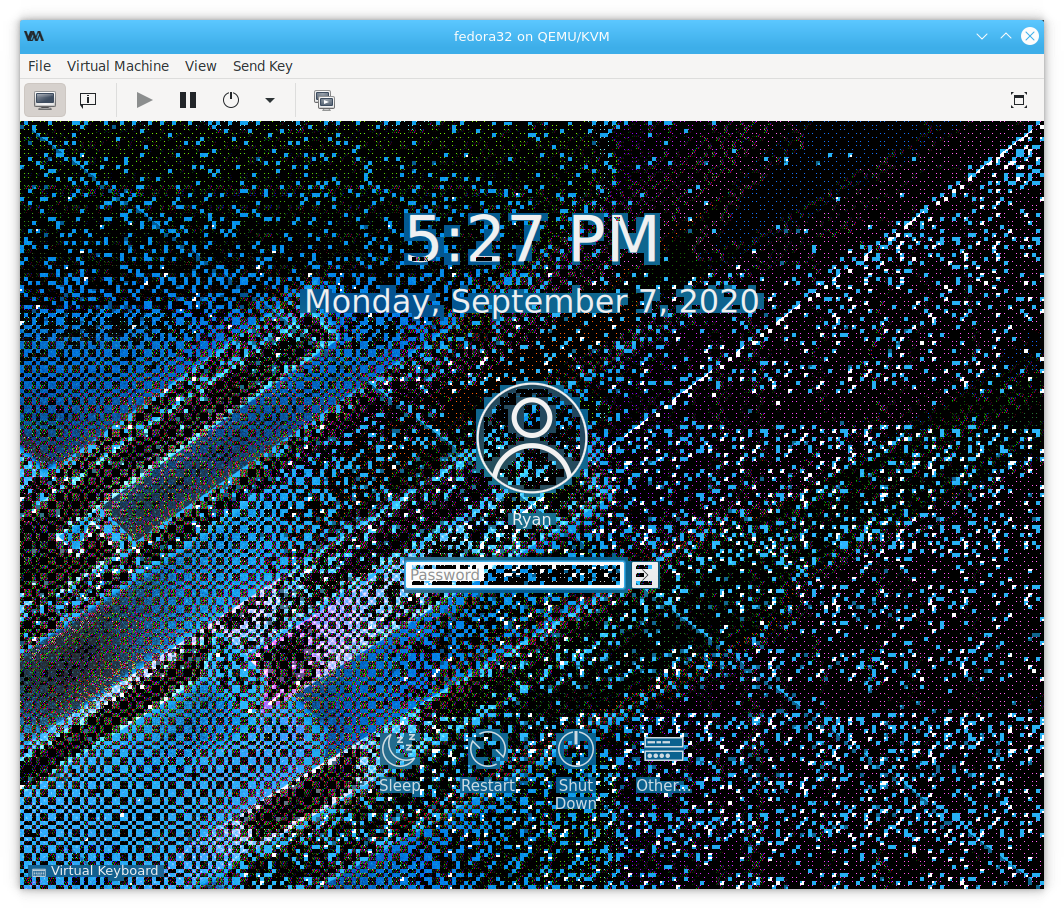
Not entirely sure about hardware support: So far my working VMs have all been on my desktop, which has an AMD RX580 GPU. I tried using a Fedora guest on my T470 Thinkpad which has integrated Intel graphics, but the screen was all crazy at login. I don’t know what hardware is supported and what isn’t. It is possible that different hardware might just need different settings selected, but I have not played around enough yet to know for sure.
Conclusion
Overall, I love this setup. It allows me to utilie my desktop to it’s full potential, by running VMs I can jump into and forget that I am in a virtalized system. This works well when testing fedora packages, or maintaining a Rawhide machine. Virgl is an awesome projects and I hope it continues to progress over time. If you haven’t tried it yet, give it a shot!
Setup Optfine with Minecraft Flatpak Install PIA Client Interfering with Podman Containers